Tutorial 1: Introduction
In this first tutorial, we'll go through the basics of how afccp is structured alongside the CadetCareerProblem
object.
1. Setting up the Development/Testing Environment
By now, you should have a working version of afccp on your computer. You've tested that the module works and will perform as expected. If this is not the case, please follow the Installation Guide to get the code working before following along in these tutorials.
In my afccp repo, I have an "executables" folder that contains all my various .py and .ipynb files that I use to
build my code and test it. If you're just getting started with this project, or if you're just getting started with
python in general, I'd recommend using jupyter notebooks. You can make a new jupyter notebook (.ipynb file) and follow
along with the code I use throughout these tutorials. For instructions on how to get jupyter notebook working
alongside the afccp virtual environment, you can follow the
Jupyter Installation Instructions.
I HIGHLY recommend actually typing out the code and following along, rather than just reading this, as that will get you familiar with the many variables used. Assuming you're using a .py script or jupyter notebook inside an "executables" sub-folder in the root directory (which is already ignored by git), you'll first need to change the working directory back to the root directory. You can use the following code to do so:
# Obtain initial working directory
import os
dir_path = os.getcwd() + '/'
print('initial working directory:', dir_path)

# Get main afccp folder path
index = dir_path.find('afccp')
dir_path = dir_path[:index + 6]

# Update working directory
os.chdir(dir_path)
print('updated working directory:', dir_path)
You should expect to see the following output, relative to your paths of course!:
initial working directory: /Users/griffenlaird/Coding Projects/afccp/executables/
updated working directory: /Users/griffenlaird/Coding Projects/afccp/
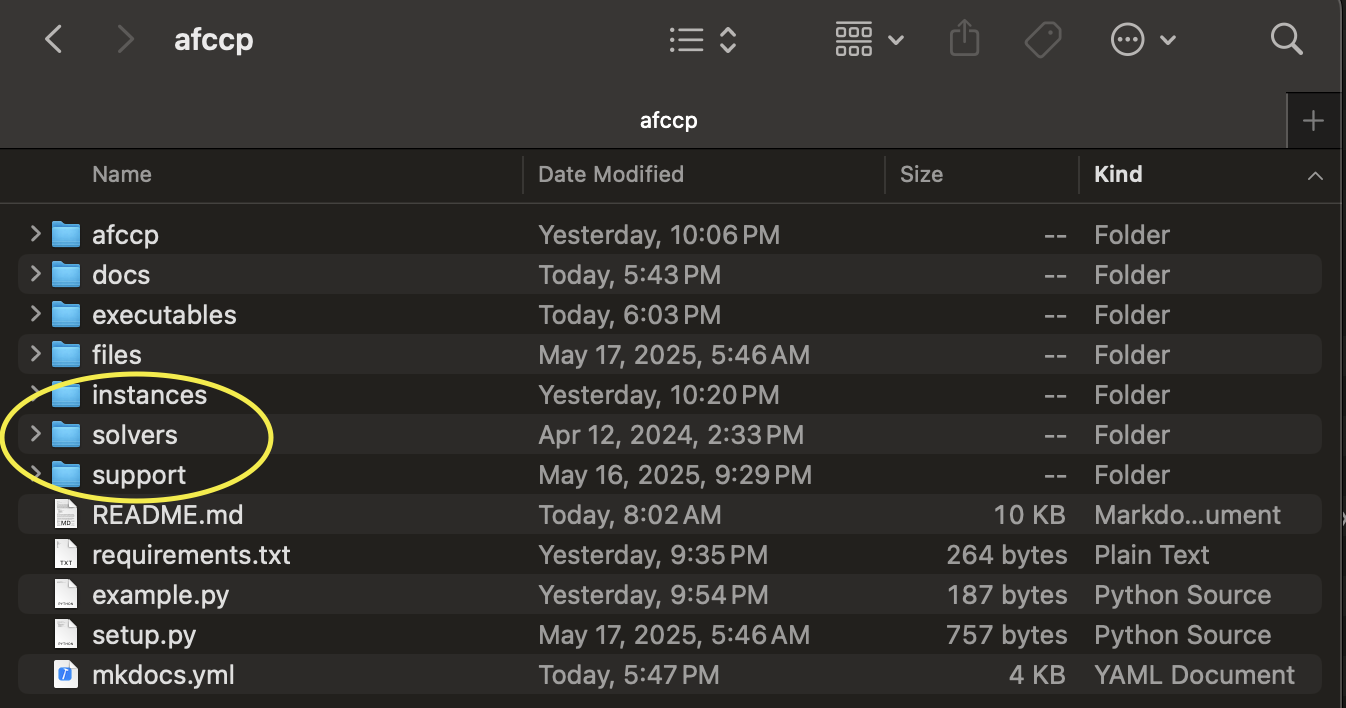
The working directory is now the root afccp folder. As mentioned in the
Project Structure section of the installation guide, there are
several folders that are generated when importing afccp for the first time. The root directory is shown below, with
the generated folders circled in yellow:
2. The CadetCareerProblem class
You are now in a position to import the main CadetCareerProblem object. You can do so like this:
from afccp import CadetCareerProblem
I like to include some print statements just to show that the module is working properly. The code also checks some less popular packages that I use to see if you have them installed because I still want this whole thing to work even if you don't have them. You should, however, if you've followed the Installation Guide:
Importing 'afccp' module...
Pyomo module found.
SDV module found.
Sklearn Manifold module found.
Python PPTX module found.
As mentioned previously, the first time you import CadetCareerProblem three folders will be created for you: instances, support, and solvers. The "instances" folder will store all the data pertaining to the instances of CadetCareerProblem that you'll be working with. The "support" folder will contain the files that apply to all instances and are therefore shared. The "solvers" folder is meant to store pyomo executables which may be useful depending on how you work with pyomo.
If for some reason the code failed and gave you some error saying it doesn't recognize "afccp" as a module, you probably need to add it to the path. You can do that like this:
import sys
sys.path.append(dir_path)  # Add the working directory to the path (contains afccp)
Now that the CadetCareerProblem class is imported, it's time to talk about what it does. This is the main class object that we'll be dealing with. It represents the class of all cadet-AFSC matching problems (various cadet class years). Please note the two different meanings of the word "class" in the previous sentence! Each "instance" of CadetCareerProblem is a distinct academic class year (2019, 2020, 2021, etc.) with various cadet/AFSC parameters.
Before we get into the data, let's talk about how the code is structured. The class "CadetCareerProblem" lives in main.py:

CadetCareerProblem calls all the other various functions across the "afccp" module that handle this problem.
I higly encourage you to at least read the __init__ function code of CadetCareerProblem as that is what defines the
data for a particular instance. The object then runs through several processes depending on what the analyst is trying to do.
I've broken up these processes into four core categories: "data", "solutions", "visualizations", and "research".
The next several tutorials will discuss these four different concepts in much more detail.
📌 Summary
In this quickstart:
- We described the necessary steps to set up the development environment
- Introduced the
CadetCareerProblemclass and showed where it resides
Continue on to Tutorial 2.